Which Appliance Gasket Fits Your Repair?
A refrigerator door that will not stay cold, an oven that leaks heat, or a dishwasher door that drips can all point to one small but essential part: the gasket. If you are asking which appliance gasket to buy, the safest answer is not to choose by appearance alone. The right replacement depends on the appliance type, the exact model, the seal’s shape, and how it mounts to the door or cabinet.
A gasket is more than a strip of rubber. It creates a barrier that helps an appliance operate as intended. A poor match can leave gaps, interfere with door closure, or fail quickly after installation. Taking a few minutes to identify the original part can prevent a frustrating return and get the repair done right the first time.
Which Appliance Gasket Do You Need?
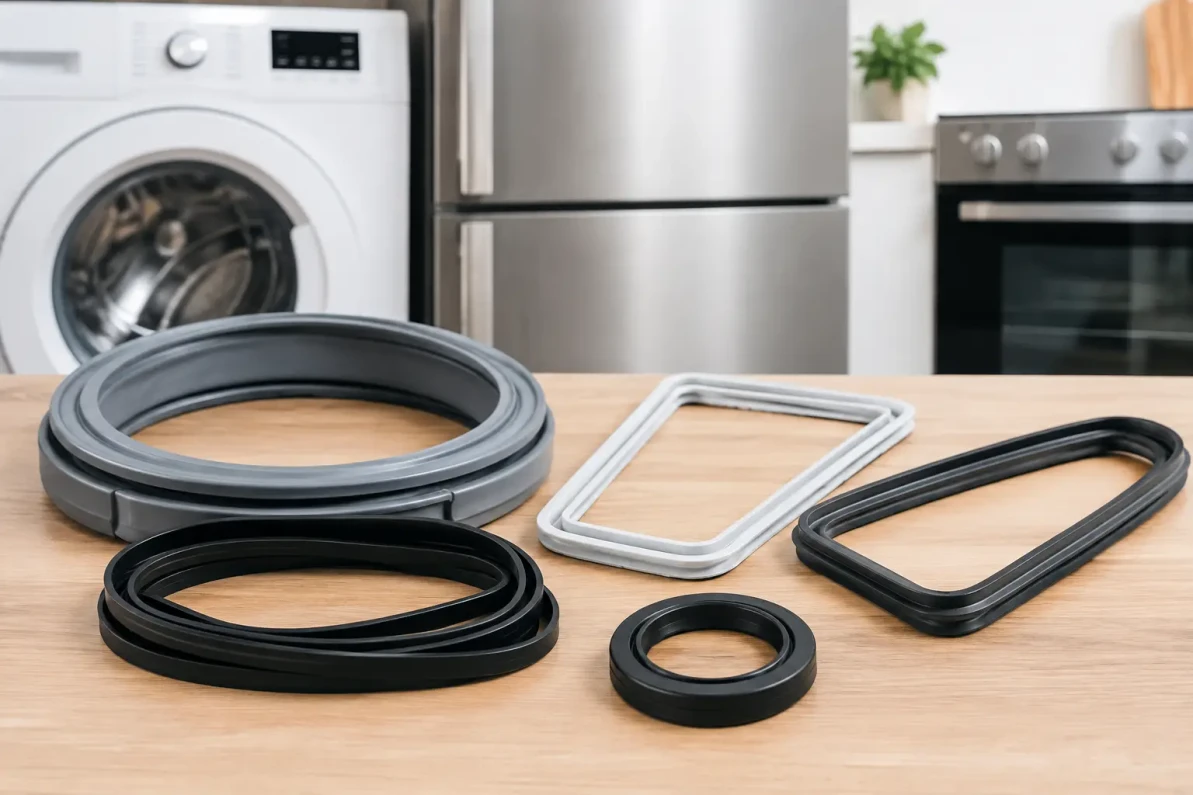
Start with the appliance itself. Refrigerator, freezer, oven, dishwasher, washer, and dryer gaskets may all be called seals, but they are designed for very different temperatures, moisture levels, door movements, and mounting methods. A refrigerator gasket is typically flexible and magnetic, while an oven door gasket is usually a heat-resistant woven or braided seal. They are not interchangeable.
Next, find the model number. This is the most useful detail for ordering an appliance replacement part. Depending on the appliance, the label may be inside the refrigerator compartment, on the door frame, behind the lower kick plate, around the dishwasher door opening, or on the appliance back. Record the complete model number, including any letters, dashes, or numbers after the main series.
The part number from the old gasket is even better if it is still readable. Manufacturers sometimes use several gasket designs across appliances that look nearly identical from the front. A part number or full model number narrows down the compatible options far more reliably than a photo or an outside measurement.
Match the Mounting Style Before You Order
The gasket’s edge tells you how it attaches. Many refrigerator and freezer gaskets slide behind a retaining strip, press into a channel, or secure with screws beneath the inner door liner. Dishwasher door gaskets often press into a groove around the tub opening. Oven gaskets may use clips, hooks, or mounting pins at specific locations.
A gasket with the wrong mounting edge may have the same overall dimensions as your old one and still not install correctly. Before removing the original part, take several clear photos of the corners, attachment edge, and any clips or fasteners. This gives you a practical reference when comparing replacement listings.
Use Dimensions as a Confirmation, Not the Only Match
Measure the old gasket from outer edge to outer edge while it is lying flat. Note the width and height, but also look at the depth of the mounting lip and the thickness of the sealing section. For a refrigerator gasket, measure the door opening it surrounds as well, since a warped old gasket can stretch or shrink slightly over time.
Dimensions help confirm that a compatible part is reasonable, especially when the old gasket has no visible part number. They should not replace model verification, though. A difference of even a fraction of an inch at a corner or mounting track can cause leaks.
Common Appliance Gaskets and What Makes Them Different
A refrigerator or freezer door gasket is usually a soft vinyl seal with a magnetic strip inside. When the door closes, the magnetic portion helps hold it against the cabinet frame. The correct gasket must match the door configuration, such as left-hand, right-hand, French door, or bottom freezer. Do not assume the two doors on a side-by-side or French-door refrigerator use the same part.
Oven door gaskets withstand much higher temperatures than cold-storage seals. They are often fiberglass-style ropes or woven strips and may look worn, flattened, frayed, or broken near a corner. Use a gasket made specifically for the oven model. Household weatherstripping, adhesive foam, and refrigerator seals are not suitable substitutes for an oven door gasket.
Dishwasher gaskets keep wash water inside the tub. The main door gasket commonly runs around the top and sides of the opening, while a separate lower door seal or sweep may sit along the bottom edge. If water appears at one lower corner, the main gasket may not be the only cause. A damaged door sweep, loose latch, unlevel appliance, or spray issue can produce similar symptoms.
Washing machines use several different seals depending on the design. Front-load washers have a large flexible door boot or bellows between the door and drum. Top-load washers may use tub seals in areas that are not intended as quick DIY replacements. Dryer door seals are generally felt or foam-style strips that help guide airflow and support proper drum clearance. Because these parts serve different jobs, searching by appliance type and model is especially important.
Check Whether the Gasket Is Actually the Problem
A gasket should be replaced when it is torn, permanently flattened, brittle, badly stained, loose from its track, or no longer making consistent contact. For refrigerator and freezer doors, condensation around the frame, frost buildup, a door that pops open, or food warming faster than expected can indicate a seal issue.
Still, the gasket is not always at fault. Clean it first with mild soap, water, and a soft cloth. Crumbs, sticky residue, grease, or packaging debris can create a small opening that looks like gasket failure. Check that the appliance is level and that the door hinges are not loose or sagging. A refrigerator door that sits low may miss the cabinet frame even with a new gasket installed.
For an oven, heat escaping around the door can be caused by worn hinges, a bent door, or improper door alignment. For a dishwasher, inspect the door latch and look for damage to the lower door sweep before assuming the perimeter seal is the only issue. Replacing the wrong part costs time and may not solve the leak or temperature problem.
What to Check Before Buying a Replacement
Keep these details together when comparing appliance gasket options:
- Appliance brand and complete model number
- Original part number, if available
- Appliance location of the gasket, such as freezer door, oven door, or dishwasher tub
- Overall width and height of the old part
- Mounting method, corner shape, clips, screws, channel, or retaining strip
- Door configuration and hinge side when applicable
Compatibility information should be specific. A listing that identifies supported model numbers is more useful than one that only says it fits a general appliance brand. Also confirm what is included. Some replacement gaskets include clips or mounting hardware, while others are gasket-only parts intended to reuse the original retainers.
Installation Tips That Help the New Seal Work
Read the installation instructions for the specific appliance before starting. Unplug the appliance when the repair requires access near electrical components, and allow an oven to cool completely. Avoid pulling an old gasket off aggressively until you understand how it is attached, since hidden retaining strips or clips can be damaged.
New refrigerator and freezer gaskets may arrive folded from packaging. Letting the gasket rest at room temperature can help it relax before installation. If a crease remains, gentle warming as directed by the manufacturer can help the material regain its shape. Do not overheat or stretch it, which can distort the seal.
After installation, inspect all four sides with the door closed. The gasket should sit evenly without twists, bunching, or open corners. On a refrigerator, a simple paper test can help: close the door on a sheet of paper at several points. Light resistance when pulling the paper suggests the gasket is making contact. If one area is loose, recheck the gasket’s position and the door alignment.
A properly matched gasket is a practical repair that can improve door closure, reduce leaks, and help protect the appliance from unnecessary strain. When in doubt, use the model number, mounting style, and original part details to guide your choice - not just a similar-looking seal. That small amount of checking is usually what separates a quick repair from a repeat job.
Recent Posts
-
Frigidaire Fridge Door Shelf Rail Broken: Replace 240534901
If the door shelf rail on your Frigidaire refrigerator has cracked, snapped off or keeps popping loo …Nov 21, 2026 -
Storage Totes for Contractors: Truck and Jobsite Guide
Every contractor knows the cost of a disorganized truck. You drive to the job, then spend twenty min …Nov 21, 2026 -
How to Pack a Heavy Box for Shipping Without Blowouts
A heavy box fails in predictable ways. The bottom seam splits when someone lifts it, a corner crushe …Nov 21, 2026