How to Find an Appliance Model Number Fast
A replacement part can look nearly identical to the one that failed and still be wrong for your appliance. That is why learning how to find appliance model number details before you shop is one of the most useful steps in any home repair. The correct model number tells you which door shelf, heating element, drain pump, ice maker, gasket, filter, or switch was made for your specific unit.
Brand name alone is not enough. A refrigerator labeled GE, Whirlpool, LG, Frigidaire, or Maytag may have dozens of versions with different dimensions, wiring connections, mounting points, and part revisions. Find the model number first, write it down exactly, and you can shop with far more confidence.
What an Appliance Model Number Tells You
The model number identifies the exact appliance series and configuration. It is the number manufacturers use to match your unit with compatible parts, manuals, diagrams, and service information.
A model number is different from a serial number. The serial number is unique to one individual appliance and can help identify its production date. For parts ordering, the model number is usually the key detail. Many labels display both numbers together, so read the entire tag carefully instead of assuming the first long code is the model.
You may also see a product number, stock number, manufacturing number, or service number. These can be helpful, but they do not always replace the full model number. When in doubt, record every number on the label and compare it with the format requested for the part you need.
How to Find Appliance Model Number Labels by Type
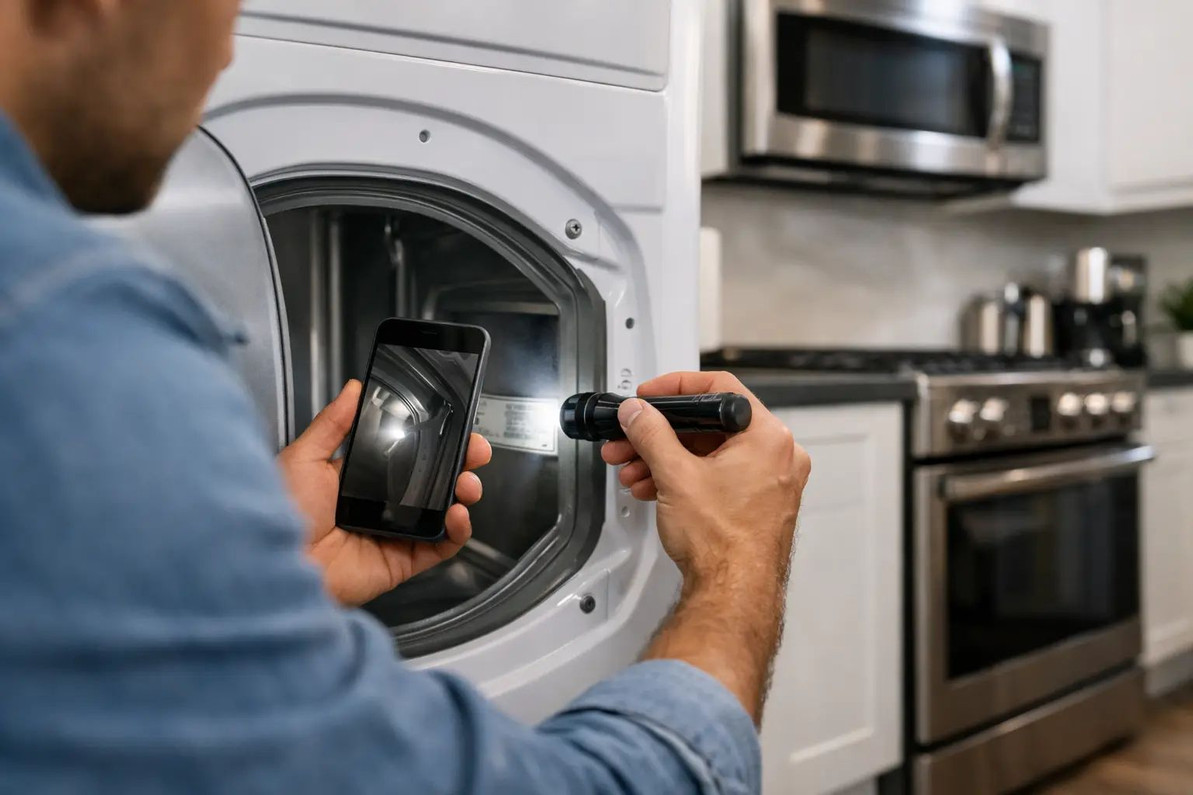
Most appliance model numbers are printed on a rating plate, data sticker, or metal tag. Manufacturers generally place these labels where they are protected from heat, moisture, and normal cleaning. A flashlight and your phone camera can make the search much easier, especially for labels near the floor or behind a door.
Refrigerators and Freezers
Open the refrigerator door and look along the interior walls, usually near the top compartment, crisper drawers, or fresh-food section. On some models, the label is behind the lower crisper drawer or along the side wall near the door hinge.
For a standalone freezer, check the inside wall, door frame, or rear panel. If the refrigerator has a removable kick plate at the bottom, the label may be behind it. Avoid pulling the unit away from the wall unless necessary. It is easier to start with accessible interior locations.
Washing Machines
For top-load washers, lift the lid and inspect the underside of the lid, the rim of the opening, and the rear control panel. The label may also sit near the lid hinge.
For front-load washers, open the door and check around the door opening, on the inner frame, or near the detergent dispenser. Some units have the tag behind a small lower access panel. If your washer is installed in a tight laundry space, use your phone camera with the flash on to inspect the rear area without moving the machine.
Dryers
Open the dryer door and look around the door opening, on the door frame, or behind the lint screen housing. Depending on the brand and model, the label might be on the rear panel, inside the cabinet opening, or beneath the control panel.
Gas and electric dryers can have similar-looking model labels, but their parts may not interchange. Always use the complete model number, including any letters, dashes, or suffixes.
Dishwashers
The easiest place to check is the inside edge of the dishwasher door. Open the door fully and look along the left or right side of the tub frame. Many dishwasher model tags are visible only when the door is open.
If you cannot find it there, inspect the top edge of the door or the side of the inner door panel. Do not confuse installation labels with the manufacturer data plate. The correct label should clearly identify the appliance model.
Ranges, Ovens, and Cooktops
For freestanding ranges, pull open the oven door and check the frame around the opening. Common locations include the lower front frame, side frame, storage drawer area, and behind the control panel.
On wall ovens, look around the oven door opening or behind the lower trim. Cooktop labels are often underneath the unit, which can be difficult to access after installation. Before removing anything, check the original manual, paperwork, or digital records from the purchase if available.
Microwaves
Countertop microwave model labels are commonly located on the back panel, side panel, or inside the door opening. Over-the-range models often have a sticker on the inner frame, along the door edge, or behind the grease filters on the underside.
Because microwave repairs can involve high-voltage components, do not remove the outer cabinet just to locate a label. For most parts, there is no need to disassemble the unit to find the model number.
Check These Places When the Label Is Missing
Labels can fade, peel, get painted over, or become unreadable after years in a busy kitchen, laundry room, rental property, or workshop. If the data plate is damaged, look for the model number in places that do not require appliance disassembly.
Start with the owner’s manual, installation guide, sales receipt, warranty registration, or appliance service invoice. Property managers and maintenance teams may also have an equipment list with model numbers recorded by unit or room.
For connected appliances, the model may appear in the manufacturer’s mobile app or account dashboard. A clear photo of the appliance’s control panel, door style, and brand badge can help narrow down a model family, but it should not be your only source before ordering a part. Small model variations can change the correct replacement component.
If you find a partial number, record it exactly as shown. Even a few readable letters at the beginning or end can help identify the full format. Do not guess missing characters based only on what appears in an online photo.
Read the Label Carefully Before Ordering Parts
Once you locate the rating plate, take a sharp, well-lit photo before closing the door or reinstalling a panel. Then write the number down in a second place. This prevents a common problem: finding the tag, starting an order, and realizing later that one letter or digit was missed.
Pay attention to characters that can be confused with one another, such as the letter O and the number 0, the letter I and the number 1, or S and 5. Hyphens, periods, and revision letters can matter too. Some brands add a suffix to identify a color, handle style, voltage version, or production revision.
It also helps to compare the model number on the appliance with the compatibility wording for the part. A listing may cover a model series, but the manufacturer’s approved fitment can be narrower than it first appears. If a part description calls for a particular model range or revision, make sure your label matches that requirement.
Why Model Number Matching Saves Time and Money
Ordering by appearance can lead to avoidable return shipping, repair delays, and more downtime for an essential appliance. This matters whether you are replacing a refrigerator shelf at home, maintaining laundry equipment in an apartment building, or stocking common parts for a repair business.
Compatible replacement parts can offer excellent value, but compatibility must be verified. The right model number helps confirm details that are easy to overlook, including connector style, mounting pattern, size, electrical rating, and whether a part fits the left or right side of an appliance.
For common repairs, bring the part number into the process too. If you can read the number stamped on the old component, compare it with the appliance model number and the replacement listing. Both details together provide a stronger match than either one alone.
A Simple Record-Keeping Habit for Every Appliance
After locating the label, save a photo in a folder on your phone named for your home, rental, office, or property. Include the appliance type and location in the file name, such as “Kitchen Refrigerator Model” or “Unit 4 Dryer Model.” This takes less than a minute and can save a lot of time when a part fails unexpectedly.
For facilities teams and commercial buyers, a basic spreadsheet with appliance location, brand, model number, serial number, purchase date, and previous repairs makes repeat maintenance much easier. It also helps ensure that anyone placing an order has the same accurate information.
Before you shop for a replacement, take the extra moment to photograph the label and verify each character. That small step is often the difference between a quick repair and a part that has to go back.
Recent Posts
-
Foam Play Mat Setup Guide for Babies and Toddlers
Once a baby starts rolling, scooting and crawling, the floor becomes the main play area, and hard fl …Oct 24, 2026 -

Folding Table as a Desk: Home Office Setup Guide
Not every home has room for a permanent desk, and not every work-from-home setup needs one. Using a …Oct 24, 2026 -
Duct Tape vs Packing Tape: Which to Use and When
You are halfway through packing a stack of boxes and the packing tape runs out, but there is a roll …Oct 24, 2026