Replacement Lawn Mower Parts: Buy the Right Fit
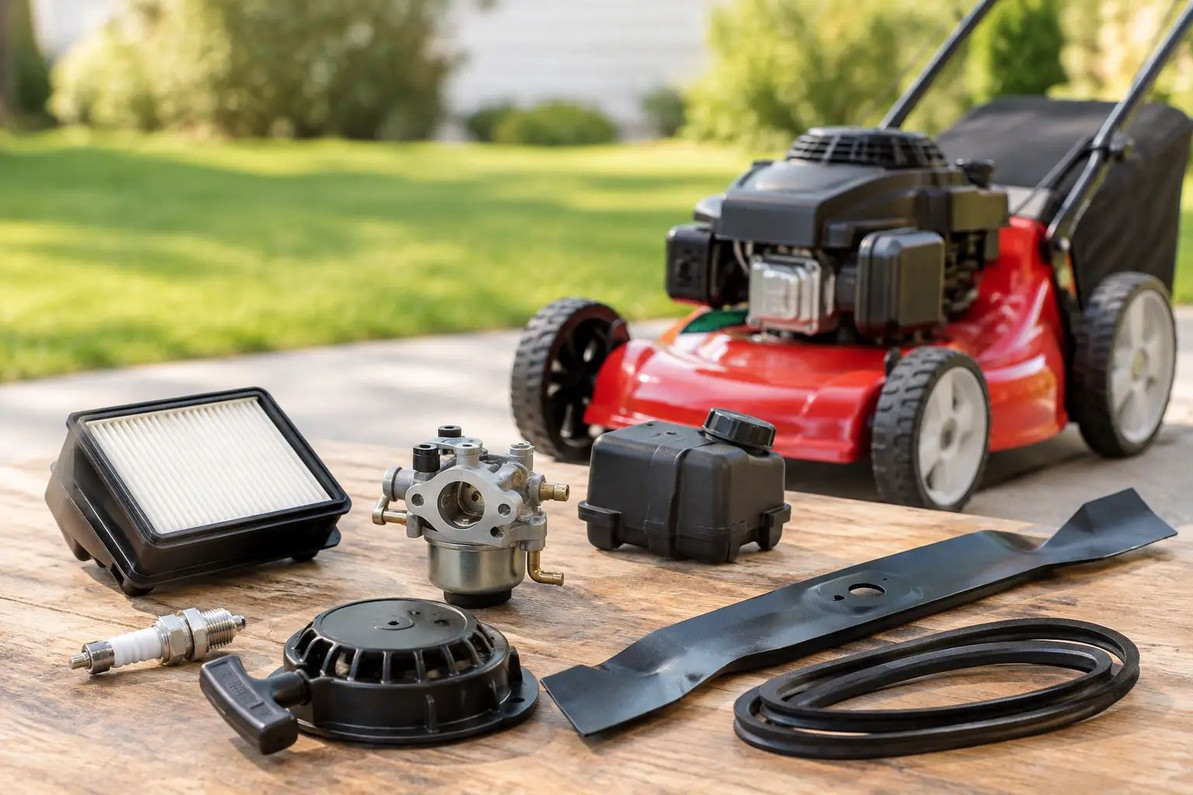
A mower that leaves strips of uncut grass, vibrates across the yard, or refuses to start does not always need to be replaced. Often, the fix is a worn blade, cracked belt, dirty filter, damaged wheel, or another small component. Buying the right replacement lawn mower parts can restore dependable cutting performance for far less than the cost of a new machine, but only if the part actually matches your mower.
The key is to shop by identification details, not by appearance alone. Many mower components look nearly identical in a product photo, yet differ by a fraction of an inch, a mounting hole pattern, a belt profile, or the engine model they fit. A few minutes spent confirming the details before ordering can prevent a return and get your mower back in service sooner.
Start With the Mower Model, Not the Part Name
“Lawn mower blade” or “drive belt” is too broad to identify a correct replacement. Manufacturers may use different blade lengths, belt sizes, spindle assemblies, wheels, and cables across models that appear very similar. Even the same mower line can change from one production year to the next.
Find the mower’s model number and serial number first. On walk-behind mowers, the identification label is commonly located on the deck, near the rear flap, around the handle frame, or close to the engine. For riding mowers, check beneath the seat, on the frame, near the footrest, or under the hood. The engine itself has a separate model number, which matters when ordering engine-specific items such as air filters, spark plugs, starter components, fuel caps, or recoil starter parts.
Write down the complete number exactly as shown, including letters, dashes, and revision codes. If you have the owner’s manual or parts diagram, use it to locate the original manufacturer part number. That number is usually the most reliable starting point when comparing replacement options.
How to Identify Replacement Lawn Mower Parts
A part number is helpful, but it should be supported by a visual and dimensional check. Before removing an old component, take clear photos from several angles. Photograph mounting points, cable ends, belt routing, electrical connectors, and any stamped numbers. Keep the screws, washers, clips, and brackets together in a small labeled container so they do not disappear during the repair.
For common wear items, confirm the details that affect fit:
- Blades need the correct overall length, center-hole shape, blade thickness, and outer mounting-hole spacing when applicable.
- Belts need the correct length, width, profile, and routing for the mower deck or drive system.
- Wheels need the correct diameter, hub width, axle bore, tread style, and mounting arrangement.
- Filters, cables, spindles, pulleys, and starter parts must match their specific engine or mower configuration.
Do not assume that a “universal” part will work without modifications. Universal components can be useful for certain applications, especially basic wheels or hardware, but they may require adapters, trimming, drilling, or adjustment. For a mower’s cutting, drive, steering, or safety-related systems, an exact compatible part is normally the better choice.
Match the Part to the Problem
Ordering a part is easier when the failure is diagnosed first. A dull blade, for example, can make grass look torn and brown at the tips, while an imbalanced or bent blade can cause noticeable vibration. Replacing a blade may solve both cutting quality and vibration, but only after checking that the spindle and blade adapter are not also damaged.
A mower that cuts unevenly may have a worn blade, low tire pressure on a riding mower, a damaged deck wheel, a loose spindle, or a deck that is out of level. Replacing one visible part without checking the surrounding components can lead to another repair shortly afterward.
Starting problems deserve the same practical approach. A mower that will not start could have an old spark plug, clogged air filter, stale fuel, loose safety switch connection, or recoil starter issue. The right replacement depends on the source of the problem. If the pull cord will not retract, inspect the recoil starter assembly. If the engine cranks but will not fire, basic maintenance items may be the better place to begin.
For self-propelled walk-behind mowers, loss of drive often points to a worn drive belt, stretched cable, worn wheel gear, or transmission-related part. Look for slipping only under load, unusual belt dust, a frayed belt edge, or a cable that no longer engages the drive system fully. These clues help narrow down the repair instead of replacing parts at random.
When to Replace One Part or a Related Set
Some repairs make sense as a single-part replacement. A cracked discharge chute, broken height-adjustment lever, missing wheel cap, or worn pull cord may not affect nearby components. Other repairs are more efficient when related wear items are handled together.
If a deck belt has failed because a pulley is rough or misaligned, a new belt alone may wear out quickly. If a blade is badly bent after hitting an obstacle, inspect the blade adapter, spindle shaft, mounting hardware, and deck for damage. When replacing a worn wheel on a self-propelled mower, compare the opposite wheel as well. Replacing both may provide more even traction if both show similar wear.
There is a trade-off. Replacing every nearby item raises the repair cost, and not every old part needs to be changed. Focus on parts with visible damage, excess play, cracking, missing teeth, stretched cables, or wear that affects operation. A careful inspection helps you spend where it matters.
Check Product Details Before You Order
A compatible replacement listing should give shoppers enough information to make a confident decision. Look for the original part number or cross-reference number, supported mower models, dimensions where relevant, package quantity, and a clear description of what is included. A blade listing, for instance, should identify its length and center-hole style. A belt listing should state its size or compatible model range. A wheel listing should identify diameter and bore size.
Read the package contents closely. A replacement part may include only the main component, not the hardware, bolts, pulleys, adapters, or retaining clips shown in an installation image. This is especially important for starter assemblies, spindles, wheels, and cable kits. If your original hardware is rusted, stripped, or missing, account for that before beginning the repair.
It also helps to consider delivery timing. During peak mowing season, a simple repair can turn into weeks of overgrown grass if a part is unavailable. Keeping frequently needed items on hand for a small fleet, rental property, landscaping crew, or maintenance department can reduce downtime. Common spares may include blades, belts, air filters, spark plugs, pins, clips, and basic deck hardware, depending on the equipment you maintain.
Install Carefully and Test Before Mowing
Work on a cool mower in a clean, well-lit area. Before servicing, turn off the engine and prevent accidental starting according to the mower manufacturer’s instructions. If the mower must be tipped for blade or deck work, follow the manual’s guidance on the correct direction to avoid fuel or oil issues.
Compare the new part with the old one before installation. Check the length, mounting points, connector shape, and orientation. Blades are commonly directional, and installing one upside down can produce poor cutting results even when the part fits the spindle. Route belts exactly as shown on the deck diagram or in the manual. A belt placed outside a keeper or on the wrong side of an idler pulley may slip, shred, or prevent the mower from driving properly.
After reassembly, turn moving components by hand where appropriate to confirm there is no binding or contact with the deck. Start the mower in a clear area and test the repair at low speed before returning to normal mowing. Listen for new noises, watch for vibration, and check that controls engage and release as expected.
The best replacement lawn mower parts are not simply the lowest-priced options or the first ones that look close. They are the parts that match your equipment, address the actual problem, and arrive with the specifications you need to install them correctly. A careful match now keeps a straightforward repair from becoming a second round of troubleshooting.
Recent Posts
-
How to Organize Toys With Clear Storage Bins
Toy clutter tends to peak right before the holidays, when birthday gifts from the year are still sca …Oct 23, 2026 -
Folding Chairs for Church Halls and Community Centers
Church halls, fellowship rooms and community centers ask more of their seating than almost any home. …Oct 23, 2026 -
Restaurant Bus Cart Guide: Using a Utility Cart for Bussing
Every busy dining room hits the same wall at some point in a shift: dirty plates stack up, servers m …Oct 23, 2026